Sign up for our newsletter! →

HanByte

From AFT to ATO, AWS Native FedRAMP Compliance through Terraform (Part 1)

Written By
hanabyte blog, aws account factory, decoupling security data, snowflake

As the movement to FedRAMP compliant environments in AWS became more prevalent, at HanaByte, we found ourselves encountering a widening variety of cloud security challenges. The complexity of achieving a FedRAMP status in this sea of ever-growing cloud architectures, often led us and customers to the same conclusion: new accounts! Why go through the process of updating the entirety of their current architecture, when we only need resources in the authorization boundary to be compliant? Not to mention less clutter, separation of boundaries, and easier maintenance after obtaining an Authority to Operate (ATO). Though it seems like a great idea, we found an overwhelming amount of options for landing zones, Terraform automation, and Infrastructure as Code (IaC) pipelines. After testing an ample amount of methods, we still hadn’t found something that fits our customers compliance needs. Luckily, AWS and HashiCorp had us covered.

We learned more about the AWS Control Tower Account Factory for Terraform (AFT) at AWS re:Inforce this year, and found a few features that made a test run worthwhile. First, we theorized we would be able to use this solution to create an AWS native yet FedRAMP-compliant infrastructure pipeline. Second, we wanted to see if it would easily integrate with our preexisting FedRAMP automation tooling. Lastly, we aimed to test the capabilities of this solution when being used to generate a landing zone. 

With that, we’re glad you’re here, and hope you’ll join us as we embark on a journey from AFT to ATO. 

Prerequisites

You’ll need a few things to begin: 

Control Tower

The key component to setting up our FedRAMP moderate environment is creating the initial landing zone with 2 OUs and 4 accounts. AFT requires us to have created AFT Management, Logging, Audit, and Payer accounts. The Payer account sits outside the OUs, AFT Management goes in the Infrastructure OU, and our security and logging accounts go in the Security OU.

After enabling Control Tower in the management account, head to the Control Tower service in the AWS console.

Click Set up landing zone to begin.

Select your regions, then continue to Configure OUs. Leave the security OU name as security, and add a new OU named infrastructure

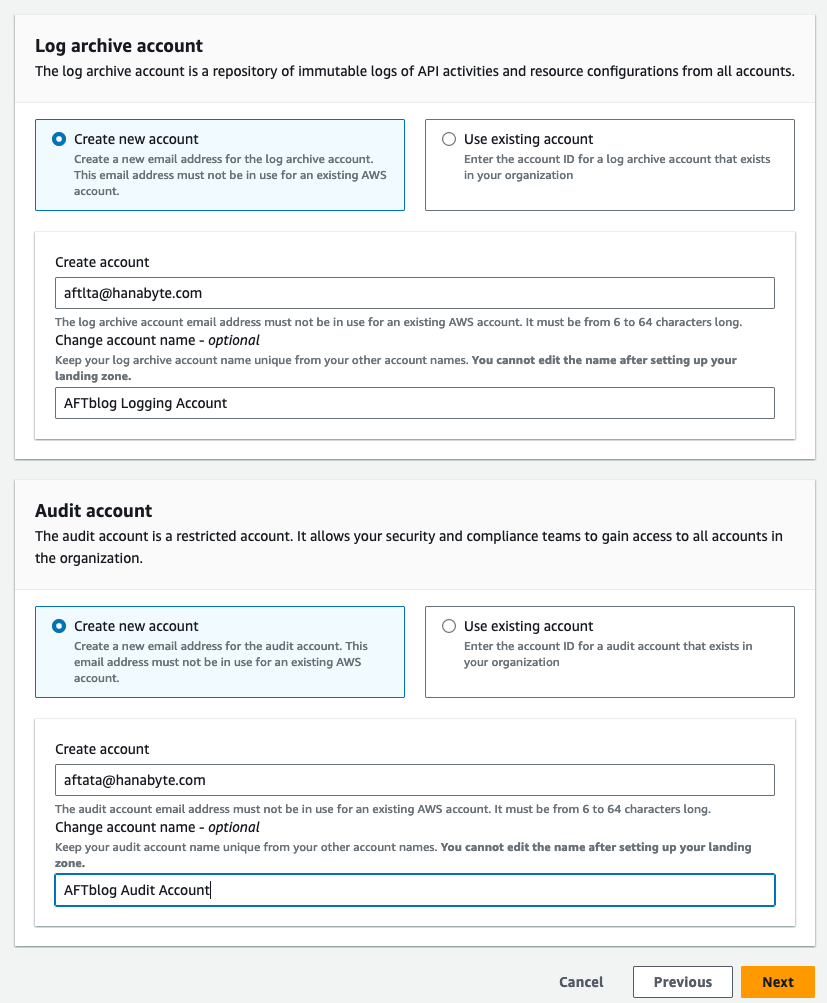
Create a new logging and audit account using the alias emails mentioned in the prerequisites.

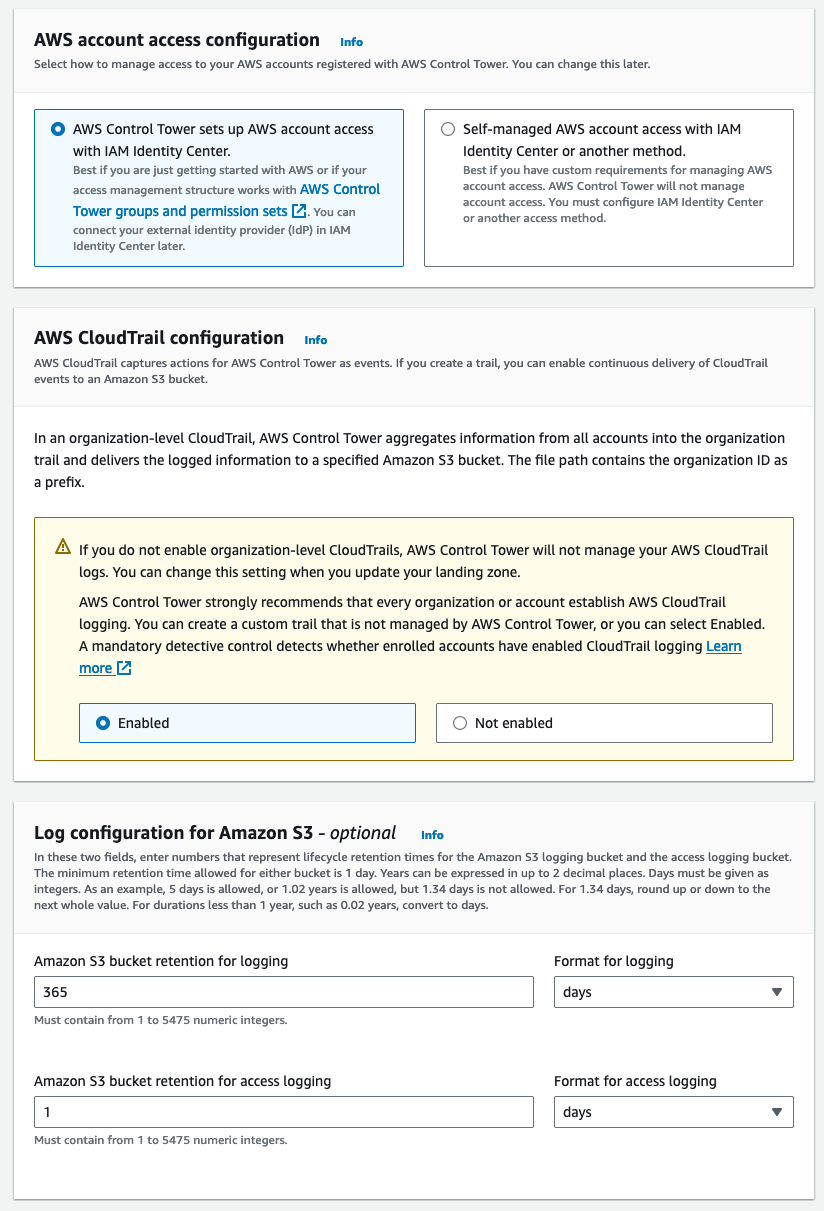
 Leave the default selections for additional configuration steps. If you’re testing, drop the logging retention down to 1 day.


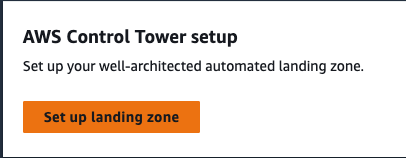
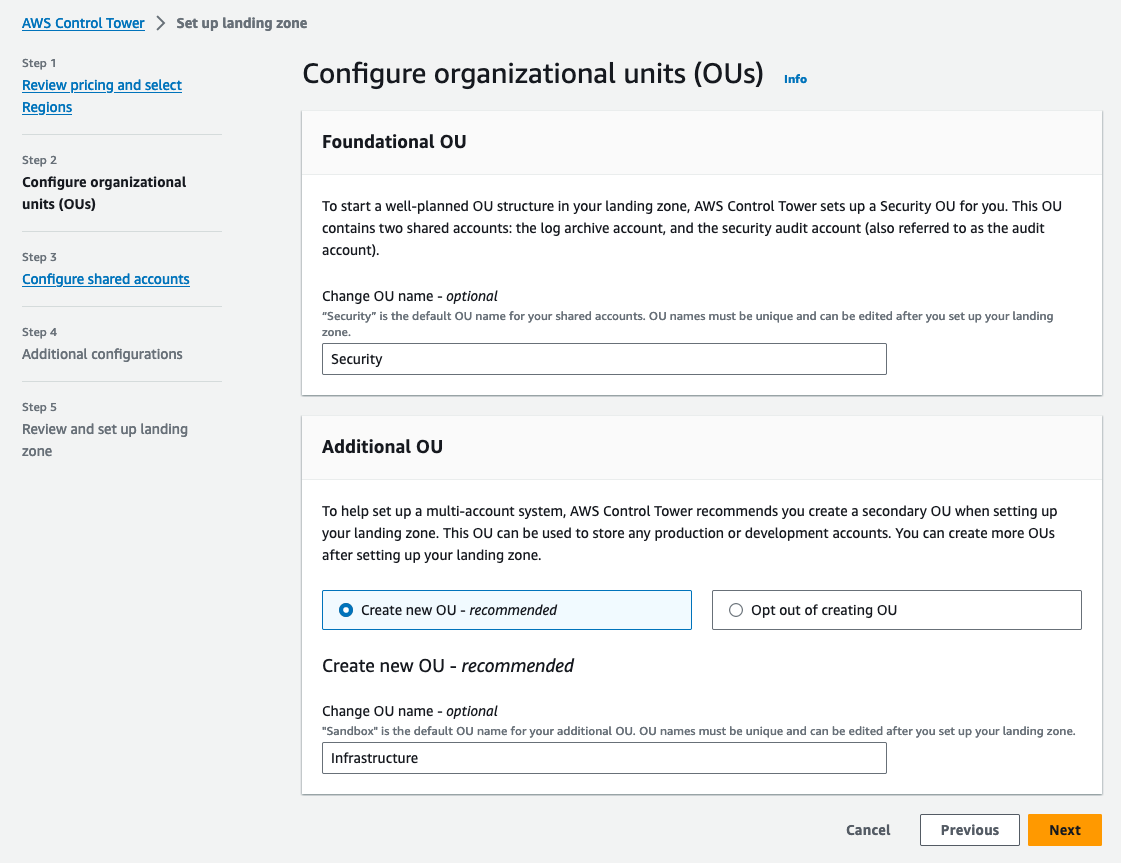
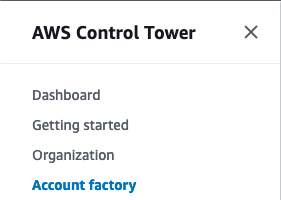
Review your setup, then navigate to Organization within AWS Control Tower console.

You’ll notice 2 OUs as seen below, and once expanded (+), accounts created by Control Tower in the security OU. 

Navigate to Account factory within the Control Tower service,

and create a new account as seen below:

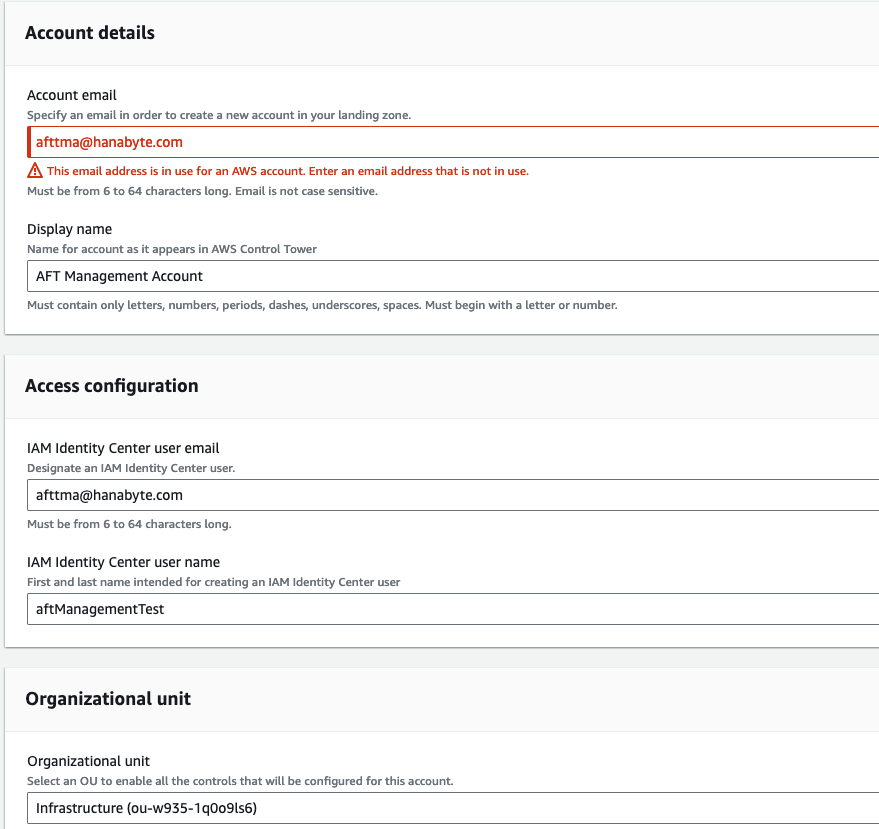
This will be your AFT management account, and it will live in the Infrastructure OU. It can be put in a separate AFT OU by creating one beforehand if you desire. Creating this account through the account factory should mean SSO is enabled already, and you can find the portal URL in the IAM Identity Center dashboard.

NOTE:  It can take 20 to 30 minutes to provision a new account using Control Tower. We recommend taking a look at more HanaByte blogs during this time, but pet videos will suffice as well.

AFT Preparation

We’re required to harbor the Terraform state of the main AFT module in the Payer account. This comes with additional benefits like keeping it tucked away to avoid accidental changes. The AFT module’s optional features can be quite powerful, thus it’s imperative we keep our Terraform applying to a minimum. 

However, before storing Terraform files, we must create an S3 bucket in the Payer account. We like to do things old school sometimes, so feel free to use a little ClickOps magic to create your bucket (just this once). An example of the bucket policy can be found below.


Once the S3 bucket has a policy applied, verify that the awscli is configured with credentials matching the payer/management account. Run the aws sts get-caller-identity command in your cli. Also ensure the account or role being used has control permissions in the management account.

Next we’ll use the following Terraform code to run the AFT module. Though you can find our example version here, we recommend creating your own workspace before cloning for the sake of simplicity. You’ll be cloning our aft-account-request folder into a CodeCommit repository named aft-account-request soon, and the overlapping can cause some avoidable problems.

				
					module "aft" {
    source  = "aws-ia/control_tower_account_factory/aws"
    version = "1.10.4"
    
    # Required Parameters
    ct_management_account_id    = "XXXXXXXXXXXX"
    log_archive_account_id      = "XXXXXXXXXXXX"
    audit_account_id            = "XXXXXXXXXXXX"
    aft_management_account_id   = "XXXXXXXXXXXX"
    ct_home_region              = "us-east-1"
    tf_backend_secondary_region = "us-east-2"
    
    # Optional Parameters
    terraform_distribution = "oss"
    vcs_provider           = "codecommit"
    
    # Optional Feature Flags
    aft_feature_delete_default_vpcs_enabled = true
    aft_vpc_endpoints                       = true
    aft_feature_cloudtrail_data_events      = true
    aft_feature_enterprise_support          = false
}


  1. We’re using version 1.10.4 of the AFT module at the date of publishing. See lines 2 and 3.
  2. Enter your management account, log account, audit account, and aft management account IDs on lines 6-9.
  3. Add the home region where you’ve deployed Control Tower, and then provide a secondary region to store tf state on lines 10 and 11.
  4. We’ll be using the open source Terraform distribution, and codecommit as our version control provider to ensure we stay AWS native, found on lines 14 and 15.
  5. Lastly, we’ll use built-in optional features to delete default VPCs, create VPC endpoints, and set up cloudtrail data events on lines 18 through 21.


NOTE: We found that when running in govcloud, the aft_vpc_endpoints must be false because of line 234 in a data.tf file, because it references an endpoint that’s nonexistent.

Lastly, run Terraform apply. You’ll notice this will create over 300 resources as of the date of publishing. This is normal and will take up to 30 minutes, so take a coffee break 🙂

AFT Account Requests

Welcome back and let’s take a look around! You’ll see quite a few resources have deployed, especially in the AWS CodePipeline service. This will range from CodeCommit repositories, to CodePipelines, Lambdas, and even some Step Functions. Though this may seem overwhelming, fear not, for our pipeline will soon come together.

With that being said, once the Terraform code is done applying, you’ll notice 4 repositories in the AWS CodeCommit service. These can be seen below:


 You should also see 2 pipelines in AWS Code Pipeline, both of which have a failing status shown below:

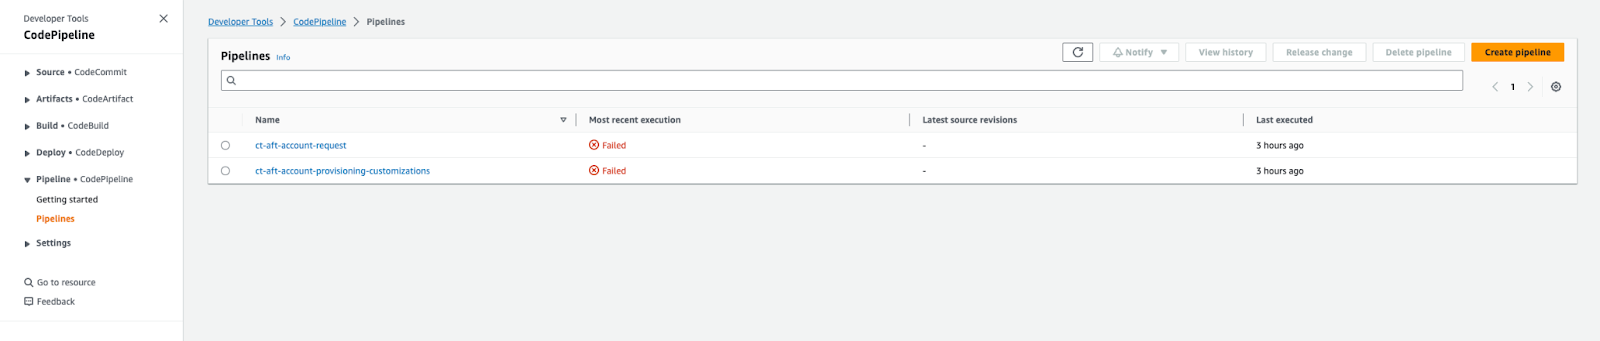
The pipelines fail because neither codecommit repository they reference has code. We’ll be adding that in the upcoming steps.

NOTE: The next steps require access to the AFT account via CLI, as all resources have been created in the AFT account for our pipeline. Switch your CLI credentials before continuing. 

Next you will need to clone down the aft-account-request repository from AWS CodeCommit. To do so, I recommend using the HTTPS(grc) tool found here.

Once the repository has been cloned down, we need to add the terraform module supplied by AWS and HashiCorp to begin creating and importing accounts. To do so, you can copy the aforementioned module from the aft-account-request folder in our public HanaByte repository, or from the AWS website, into the aft-account-request folder you cloned from CodeCommit.

Next, use the aftblog/aft-account-request/terraform/main.tf file (shown below) to begin creating accounts. This leverages the AWS/Hashi module you’ll find in the modules folder, at the same level as main.tf. Fill in default values with your own.

				
					module "aft_management_account" {
    source = "./modules/aft-account-request"
    
    control_tower_parameters = {
        AccountEmail              = "email@email.com"
        AccountName               = "AFT Management Account"
        ManagedOrganizationalUnit = "Infrastructure"
        SSOUserEmail              = "email@email.com"
        SSOUserFirstName          = "FirstName"
        SSOUserLastName           = "LastName"
    }
    
    account_tags = {
        "ABC:Owner"       = "email@email.com"
        "ABC:Environment" = "blog"
        "ABC:Project"     = "123456"
    }
    
    change_management_parameters = {
        change_requested_by = "YourName"
        change_reason       = "testing the account vending process"
    }
    
    custom_fields = {
        custom1 = "a"
        custom2 = "b"
    }
    
    
    account_customizations_name = "ct-aft-account-provisioning-customizations"
}

module "transit_account" {
    source = "./modules/aft-account-request"
    
    control_tower_parameters = {
        AccountEmail              = "email@email.com"
        AccountName               = "Transit Account"
        ManagedOrganizationalUnit = "Infrastructure"
        SSOUserEmail              = "email@email.com"
        SSOUserFirstName          = "FirstName"
        SSOUserLastName           = "LastName"
    }
    
    account_tags = {
        "ABC:Owner"       = "email@email.com"
        "ABC:Environment" = "blog"
        "ABC:Project"     = "123456"
    }
    
    change_management_parameters = {
        change_requested_by = "YourName"
        change_reason       = "testing the account vending process"
    }
    
    custom_fields = {
        custom1 = "a"
        custom2 = "b"
    }
    
    account_customizations_name = "ct-aft-account-provisioning-customizations"
}


					module "shared_account" {
    source = "./modules/aft-account-request"
    
    control_tower_parameters = {
        AccountEmail              = "email@email.com"
        AccountName               = "Shared Account"
        ManagedOrganizationalUnit = "Infrastructure"
        SSOUserEmail              = "email@email.com"
        SSOUserFirstName          = "FirstName"
        SSOUserLastName           = "LastName"
    }
    
    account_tags = {
        "ABC:Owner"       = "email@email.com"
        "ABC:Environment" = "blog"
        "ABC:Project"     = "123456"
    }
    
    change_management_parameters = {
        change_requested_by = "YourName"
        change_reason       = "testing the account vending process"
    }
    
    custom_fields = {
        custom1 = "a"
        custom2 = "b"
    }

    account_customizations_name = "ct-aft-account-provisioning-customizations"
}


Don’t forget, this main file is in the AWS CodeCommit repository. Once you’re done editing, push these changes into the repository then navigate to AWS CodePipeline. You’ll notice the changes are already running in the ct-aft-account-request pipeline. This is because AFT uses a GitOps model, thus our changes will automatically begin running after we commit. Please note that if you’d like to make changes to the Payer account, or any other accounts that aren’t in the supplied code examples, add another code block with the appropriate account information. Lastly, if you want to see the accounts that are being tracked by AFT, navigate to DynamoDB and view the aft-request table.

This brings us to the end of Part 1 in the AFT to ATO series. We’ve already accomplished quite a few things, such as:

  • Creating accounts and OUs using AWS Control Tower

  • Making an S3 bucket to track our AFT Terraform state

  • Creating CodeCommit repositories, CodeBuild projects, CodePipelines, Lambda Functions, and Step Functions (and more s3 buckets of course) using the AFT module

  • Adding accounts to AFT so we can provision resources later

Speaking of adding resources later, be on the lookout for AFT to ATO Part 2! We’ll finish setting up ATO, take a quick peek at global customizations, and then implement our first control. We appreciate you joining us on this journey to AFT and FedRAMP, and look forward to working together as we continue down the path to compliance!

Browse Our Categories

Relevant Blogs

HanaByte blog compliant Operating System with HanaByte consultant Simon Abisoye
Compliance

Compliant Operating System (OS)

A compliant operating system is any operating system that meets specific standards established by an entity. For example, if an organization wanted to create a CIS-compliant operating system, it would need to meet the standards set forth by the Center for Information Security, whose sole purpose is to “create confidence” in the connected world. A virtual machine image (VMI or image for short) is a bootable copy of the operating system of a virtual machine in the cloud.

Read More →
Landing zones by Jenny Tang
Compliance

What is a Landing Zone?

For most companies shifting to the cloud, the cloud environment and resources needed to set up numerous accounts is complex. The challenge grows when balancing efficiency with security–organizations want complete cloud environments as soon as possible without overlooking key elements such as establishing firewalls or access controls. Addressing this issue begins with a landing zone, a secured and well-architected multi-account cloud environment that acts as a starting point or template allowing organizations to quickly deploy users, accounts, and environments for business needs.

Read More →